Achieving a flawless, factory-smooth finish on furniture, cabinets, or DIY decor can feel impossible with a standard paintbrush or roller. Brush strokes, drips, and trapped dust often ruin the final look. If you want a truly professional, sleek surface, spray finishes are the ultimate game-changer for home DIYers.
Whether you are using convenient aerosol cans or a High-Volume Low-Pressure (HVLP) spray gun, choosing the right topcoat is crucial. Here is a breakdown of the best spray finishes to achieve a high-end, professional look right in your garage or workshop.
The Top Spray Finishes for DIY Projects
Different projects require different levels of durability, clarity, and dry time. Below are the best options available for home use.
1. Spray Lacquer (The Furniture Maker’s Choice)
Lacquer is the gold standard for interior wooden furniture. Unlike other finishes, lacquer dissolves into the previous layer as it dries, creating a completely seamless, molecular bond.
-
The Look: Incredibly smooth, high-clarity finish that highlights wood grain beautifully. Available in matte, satin, semi-gloss, and high-gloss.
-
Pros: Dries exceptionally fast (often in 15–30 minutes), meaning less time for dust to settle on your wet surface. Easy to repair.
-
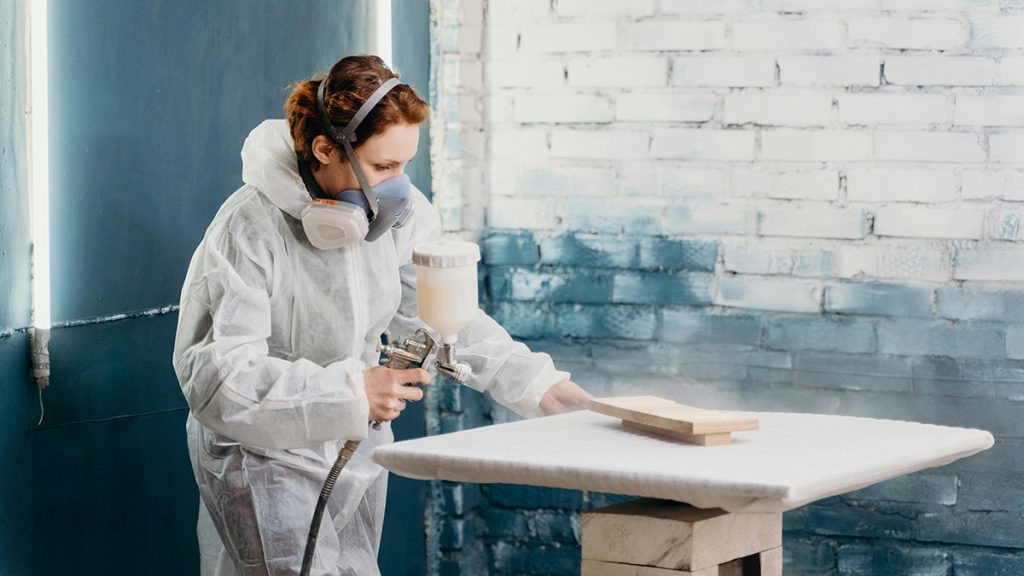
Cons: Strong fumes require excellent ventilation and a respirator. Not highly resistant to heavy water exposure or strong chemicals.
-
Best For: Dining tables, coffee tables, dressers, and decorative wooden boxes.
2. Aerosol/Spray Polyurethane (The Durability King)
Polyurethane is a synthetic coating that offers maximum protection against scratches, spills, and heavy wear.
-
The Look: Thick, protective, and smooth. Note that oil-based options add a warm, amber tint, while water-based options dry crystal clear.
-
Pros: Highly durable, water-resistant, and tough enough for high-traffic surfaces.
-
Cons: Dries much slower than lacquer (can take hours), increasing the risk of airborne dust particles sticking to the wet finish.
-
Best For: Kitchen cabinets, tabletops, desks, and outdoor furniture (using an exterior-grade spar urethane).
3. Spray Shellac (The Natural & Traditional Finish)
Shellac is a natural product secreted by the lac bug, dissolved in denatured alcohol. In a spray format, it provides an elegant, vintage-quality finish.
-
The Look: Deep, warm, and highly reflective with an organic, high-end aesthetic.
-
Pros: Non-toxic once cured, seals wood oils completely, and adheres to almost any surface (great as a barrier coat). Dries quickly.
-
Cons: Easily damaged by alcohol (perfumes, drinks) and high heat.
-
Best For: Antique restorations, picture frames, instruments, and projects not exposed to moisture or heat.
4. Chalked or Satin Spray Paints (For Painted Finishes)
If you aren’t showcasing wood grain and want a solid color, high-quality decorative spray paints are the way to go.
-
The Look: An ultra-matte “chalked” look or a sleek modern satin.
-
Pros: Excellent coverage, covers imperfections well, and eliminates brush marks entirely.
-
Cons: Requires a clear topcoat if used on high-traffic surfaces.
-
Best For: Transforming old chairs, metal fixtures, lamps, and accent decor.
Comparison Matrix for Quick Reference
| Finish Type | Dry Time | Durability | Best Skill Level | Recommended Application |
| Lacquer | Ultra-Fast (15-30 min) | Medium | Intermediate | Fine indoor furniture |
| Polyurethane | Slow (2-4 hours) | High | Beginner to Pro | Cabinets, desks, outdoor items |
| Shellac | Fast (30-45 min) | Medium-Low | Intermediate | Antiques, accent pieces |
| Satin/Chalk Paint | Fast (20-30 min) | Medium | Beginner | Upcycling decor, metal, plastic |
Pro-Tips for a Flawless Spray Application at Home
To get that coveted factory-like finish, your technique matters just as much as the product you choose:
-
Prep is 90% of the Work: Any bumps, scratches, or dust will be magnified by a spray finish. Sand your project progressively up to 220-grit, wipe away all dust with a tack cloth, and ensure the surface is completely clean.
-
Control Your Environment: Spray in a space with low humidity and temperatures between 65°F and 80°F (18°C–27°C). High humidity can cause lacquer to “blush” (turn a cloudy white).
-
The 50% Overlap Rule: When spraying, keep your hand moving parallel to the surface at a consistent distance of about 8–10 inches. Start spraying before you reach the edge of the wood, and overlap each previous pass by 50%.
-
Multiple Thin Coats Over One Thick Coat: Thick coats lead to runs, sags, and bubbles. Spray 3 to 4 light, even coats instead.
-
Sand Between Coats: Once a coat is completely dry, scuff-sand it lightly with ultra-fine sandpaper (320 or 400-grit) or a fine sanding sponge. This knocks down any airborne dust nibs and gives the next layer something to grip onto.
Amazon Disclaimer:
As an Amazon Associate, I earn from qualifying purchases. This means that if you click on certain links within this post and make a purchase, I may receive a small commission at no additional cost to you. This helps support the site and allows us to continue creating high-quality DIY content.